Showing posts with label Seed. Show all posts

Saturday, April 26, 2014

Green Week ~ WOW

So this week we had Earth Day & Arbor Day
Two celebratory reasons/excuses to Get Out And Plant Something
Did You?

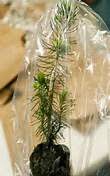
We planted 100 rescued Tree Seedlings with the #GreenKids
Dogwoods, Pines, Cedars, & Silver Oaks.


On our own home front we planted a seed grown Teak Tree


as well as a couple of Lilacs .


and a Red Rocket Seed Grown Crepe Myrtle.


Planting trees are good for you environment in close as well as an
overall Globally good thing to do.
Greener neighborhoods are cooler neighborhoods.
Use trees to cut energy costs by solarizing your home.

Life on Earth requires Healthy Forests.

Please choose Greener Living practices so we'll have a livable Earth for future generations.

Hope everyone had just a Spectacular week.
~V

Tuesday, December 31, 2013

SuperSeeds ~ Eat 'Em

These are a few supersedes to search out when shopping
and why they are good for you.

CHIA ~
Rich in Omega - 3
May allieviate hunger
Add whole to cereal, baking, and Smoothies


FLAX ~
Omega - 3 rich
Nutty Flavor
Always grind or buy ground seed.
Whole Seed are very hard to digest.


HEMP ~
Tastes like sunflower seeds
Contains all essential Amino Acids
Ideal Protein Source
Sprinkle on Yogurt, cereal, or salads


SESAME ~
Tasty Crunchy and slightly Sweet
High in Magnesium, Copper, and Calcium
Add into stir frys or toss with steamed vegetables

Wednesday, May 22, 2013

Benefits of Raised Bed Gardening

These Are NOT my Words or Pictures
I just think this is an easy explaination on this topic,
and it could have been my words I thing it is put excellently

Just wanted a disclaimer on this so no one get ticked ;)
Words By : Lynnae McCoy
Though it’s tempting to just hoe out a patch of ground and plant some seeds, I’m convinced that the initial work we put into building raised garden beds will pay for itself in the long run. Why? Let me count the ways
1. Weed Control. Because a raised garden bed is planted above existing soil, you can put down weed barriers between the ground and the soil you put in your garden box. If you’re diligent to use weed-free soil in your box, any weeds in your garden should be few and far between.
2. Pest Control. Our neighborhood has a little gopher problem. If I were to plant my seeds directly into the ground, the gophers could eat my garden right up. But with a raised bed, I can put chicken wire down beneath my garden, keeping the underground critters out. And if I have to, I can make a little chicken wire cage to place above my garden box, keeping out other animals.


3. Better Soil. When you plant a garden directly in the ground, you need to start with the soil that’s already there, and that soil might not be ideal for gardening. You can add things to it to make it better, but it may never be ideal. However, when working with a raised garden bed, you can use whatever soil will work best for your garden, right from the get-go.
4. Portability. What happens if you move? With an in-ground garden, you leave it behind, and start all over at your new place. But if you use a raised garden bed, particularly a small one like a square foot garden, you can bag up your soil and take your garden box with you. At least that’s what I did when I moved.
5. Higher Yields. Because of the better soil used in raised bed gardens, they tend to have higher fruit and vegetable yields than traditional row gardens.


6. Accessibility. One of the best things about raised bed (specifically square foot) gardens is their accessibility. Because each garden block is only 4′ x 4′, you can easily reach every single plant to water, inspect, and pick the produce.
7. Adaptability. For those who aren’t mobile enough to get down on the ground to reach their gardens, small raised beds are adaptable. Just put the garden on a tabletop. Since the garden is not dependent on soil beneath the box, you can put your garden box anywhere you like.
8. Frugality. Seeds are expensive. In a traditional row garden, you scatter the seeds, then thin the plants as they grow, wasting seeds. In a raised bed garden, you plant only the amount of seeds you need. Properly stored, the additional seeds will be good for another year or two, saving you money on next year’s garden.
9. Longer Growing Season. Gardening seasons depend on the temperature of the soil. The ground in a 4′ x 4′ box will warm up more quickly than the ground under the lawn. In addition, it’s relatively simple to make a cold frame for a raised garden bed to extend the gardening season further.
10. Aesthetically Pleasing. Raised garden beds look neat and tidy. In addition, if you’re a creative person, you can make some pretty cool looking gardens. Your garden could easily become the focal point of your yard.


Friday, February 8, 2013

Tomatoes and Calcium (Ca)


Tomatoes heirloom or hybrid they are the most popular grown vegetable, which is actually a fruit.


They are delicious and nutritious, in all forms. Eating tomatoes cooked is the best way to help your body assimilate the nutrients.

Tomatoes require consistant amounts of calcium (Ca), to strengthen cell walls to resist bacterial and fungal infection.

Inadequate amounts of calcium partnered with inconsistant moisture levels are the main causes of Blossom end Rot.
Two organic ways to integrate calcium into your soil is to recycle eggshells, and boil bones to remove leftover flesh and cartlages. I prefer eggshells and will dry them in a low temp oven and grind in a mortar and pestle, you get nice powder about a teaspoon is enough for each plant.


(you can also use bonemeal, tums, and calcium supplement pills)
When planting, place calcium into the planting holes so the roots start transporting it immediately to the new transplant.
Give seeds a good start by planting seeds inside egg shells.


Wash and allow to air dry then fill with soil, carefully make holes in the bottom with a pin.
Plant seeds inside and place in a warm windowsill.

You can give them additional applications of calcium throughout the growing season. Let eggshells sit in a gallon of water about a week (easily made ahead), calcium will leach into the water then use this for your tomato plants,

I will post Tomatoes other important nutrition need in another blog later. We will be talking Potassium (K)

Have a great Garden
Test Your Soil
Feed Yourself Well
~V


Monday, January 21, 2013

How to Start Canna From Seed


I had some happy Canna Plants this year and collected and shared oodles of seed.
But I didn't know what to do with them. I sent out the scout and came back with this information from one of my Group Buddies.
This is not my personal information

How to grow Canna from seed:
Scarify the seeds in January. Take the seeds, one by one, and rub the ends of the seeds on the sandpaper until you can see a small section of the white layer.
Place the canna seeds in the glass bowl. Cover the seeds with warm water and let them sit for 24 hours.
Fill the nursery tray with vermiculite. Dampen the vermiculite until it is moist, but not soggy. Remove the seeds from the bowl of water and plant them ¼ inch deep in the vermiculite.
Place the nursery tray in a warm area indoors. and keep the vermiculite moist during the germination period. The seeds will germinate in about 7 days.
Move the nursery tray to an interior location that receives sunlight. Check the vermiculite often and do not allow it to dry out. Rotate the nursery tray as needed, to prevent the seedlings from growing sideways.
Transplant the canna seedlings when they are six inches tall. Fill the flower pots with moistened potting soil, and then plant the canna seedlings into their individual pots.
Place the flower pots in a sunny window. Keep the potting soil moist, and continue to rotate the plants periodically.
Fertilize the seedlings with a granulated, organic fertilizer. Follow the directions on the package.
Move the flower pots outside after the danger of frost is past. Set the plants in a partially shaded area for two weeks to "harden" them off before their final transplant.
Plant the young cannas in a sunny location. Using a garden trowel, dig holes the same size as the flower pots, 18 to 24 inches apart. Dampen the holes.
Place one hand over the soil in the flower pot, and turn the pot upside-down. Lift off the flower pot, then lower the soil ball into the prepared hole.
Pat the dirt around the canna until it is firm and any air spaces are filled. Water the ground around the new plantings.